1. Industry Background
Power batteries are one of the important components of new energy vehicles, and have a significant impact on key indicators such as the range, vehicle life, and safety of new energy vehicles. Power batteries account for nearly 40% of the cost of new energy vehicles. When power battery cells, acquisition circuits, battery management systems (BMS) and other internal accessories fail, the power battery pack needs to be disassembled and repaired. However, power batteries have high voltage in real time, so how can standard safety operations be performed?
2. Preparations before disassembly
To ensure the safety of the battery removal process, high voltage must be applied to the vehicle before removing the battery pack, and verify whether the discharge is complete. The specific steps are as follows:
1. High voltage power supply
Take good early protection: turn off the vehicle’s electrical equipment – fake door locks – turn off the vehicle’s power – store the key – open the front hood.
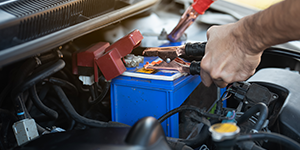
Remove the negative electrode of the low-voltage battery
Isolate the negative electrode (wrap with insulating tape or insulating sleeve)
Remove the maintenance switch (if the vehicle is equipped with a maintenance switch, wear insulating gloves and remove the maintenance switch)
2. High voltage electrical testing
After disconnecting the high-voltage battery, wait for 5 minutes, put on insulating gloves, unplug the high-voltage busbar of the power battery, and use a multimeter to measure the voltage between the positive and negative poles of the high-voltage busbar and the vehicle body. It should be lower than 1V; if it is higher than 1V, wait for a few minutes or use a discharger to discharge it, and then use a multimeter to measure whether the voltage is lower than 1V.
3. Disassembly steps
1. Lifting the vehicle
Lift the vehicle body to about 1.7 meters off the ground (suitable height for removing the power battery according to your height), lock it and make sure the support is stable again.
2. Remove the rear lower guard plate
Use a 10mm hexagon socket to remove the lower guard plate at the rear of the front cabin

3. Remove the water inlet pipe
Loosen the battery water inlet pipe fixing clamp and disconnect the battery water inlet pipe 1 from the power battery system assembly.

Note: Catch the leaking antifreeze
4. Remove the water pipe

5. Clean the coolant
① Install the pneumatic spray gun hose 3 to the water inlet of the power battery system assembly.
② Place the container 2 with scale under the water outlet 1 of the lithium-ion power battery system assembly.
③ Use the pneumatic spray gun to carefully blow the coolant in the power battery system assembly into the container and discharge as much coolant as possible.

6. Disconnect the high and low voltage plugs
①Open the unlocking part and disconnect the low-voltage signal connection plug (arrow C).
②Use the T25 flower-shaped screwdriver socket to loosen the battery high-voltage wiring harness connection plug fixing bolt (arrow A)
③Disconnect the battery high-voltage wiring harness connection plug (arrow B)

7. Remove the grounding wire
Remove the fixing bolts of the grounding harness of the power battery system assembly

8. Disassemble the battery assembly
① Provide support for the power battery system before disassembly and assembly

②Remove the fixing bolts of the lithium-ion power battery system assembly

③ Move the power battery system assembly to the maintenance area and isolate and warn

4. Installation steps
The installation steps are opposite to the removal steps. The specific operation details are as follows:
①Place the power battery assembly directly below the vehicle power battery installation position, and raise the lifting platform until the upper part of the battery pack fits the bottom of the vehicle body, and the power battery bolt hole is aligned with the vehicle installation hole and positioning pin;
②Install the power battery assembly fixing bolts. When tightening the bolts, tighten them diagonally from the middle to both sides (tighten them several times, pre-tighten them first, and then tighten them to the standard value in 2-3 times);
③Check and confirm that all bolts have been installed and are absolutely tightened, slowly and evenly lower the lifting platform and move the battery lifting vehicle aside;
④Install the grounding wire between the power battery system assembly and the vehicle body;
⑤Plug the low-voltage wiring harness plug into the power battery in place, and use the bolt tightening torque;
⑥Plug the high-voltage wiring harness plug into the power battery, and use the bolt tightening torque;
⑦Install the power battery water inlet and outlet pipes (if there is no water inlet and outlet pipes, no installation is required);
⑧Install the lower guard plate at the rear of the front cabin;
⑨Fill the coolant to the highest point between -MAX- and -MIN- of the auxiliary water tank.